6 User interface
The FLIR Screen-EST application consists of two windows; the visitor window and the operator window.
6.1 Visitor window
The visitor window is what the screened person sees.
You can customize the visitor window text and some of the graphics by settings, see section
6.3 Settings page
.
6.1.1 System closed
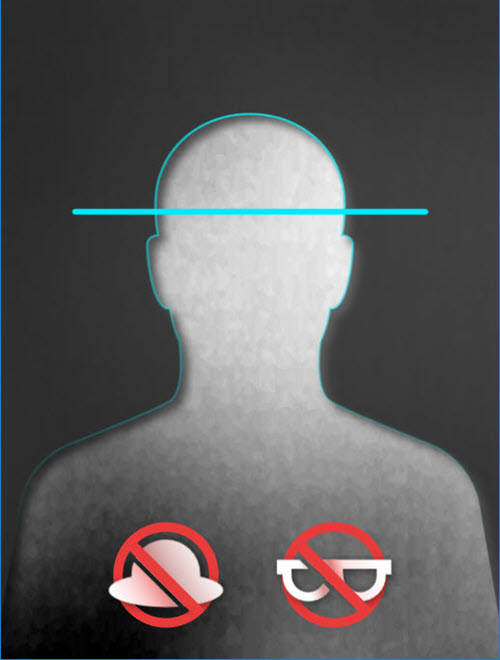
When no camera is connected and when the screening is deactivated, the system closed screen is displayed.
6.1.2 System idle
When the screening is enabled and the system is looking for faces, the system idle screen is displayed.
6.1.3 System measuring
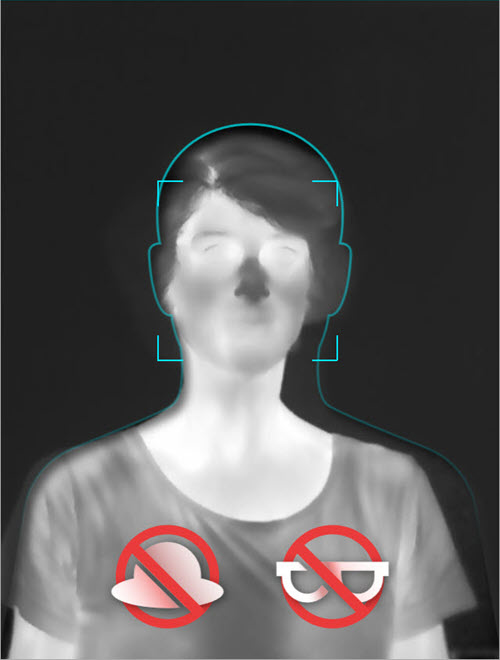
When the system has detected a face and is measuring the temperature, a measurement box is displayed.
6.1.4 Screening results
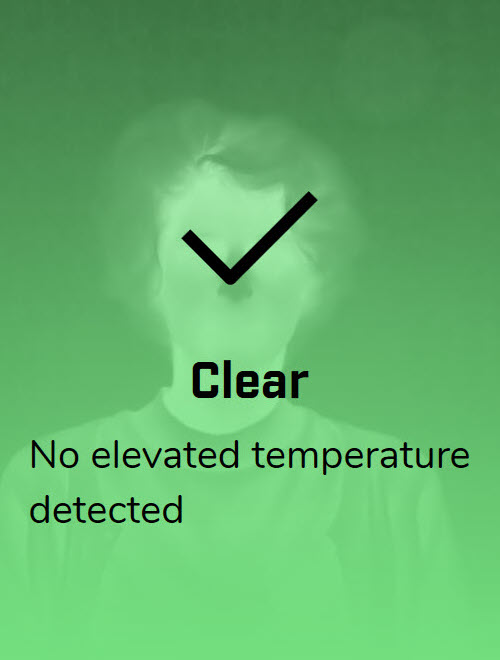
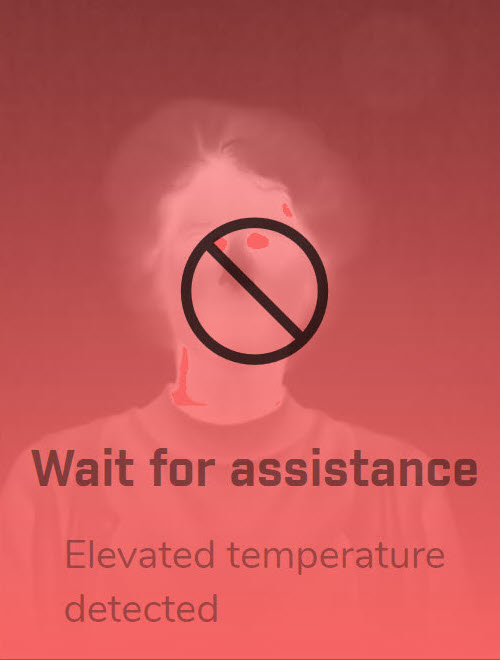
When the system has analyzed the temperature, the screening result is displayed.
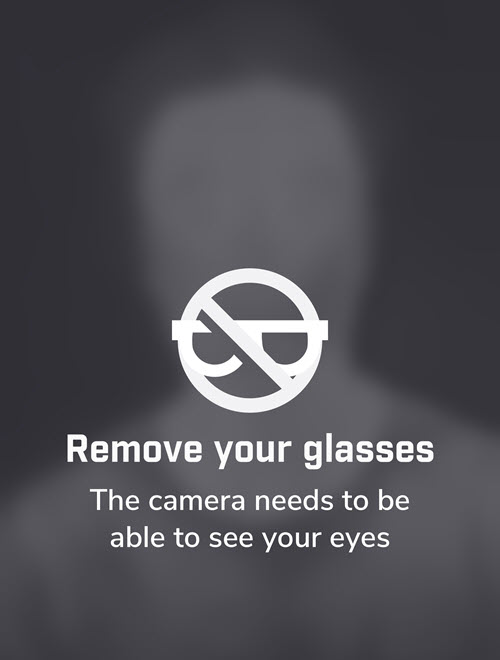
6.1.5 Remove your glasses
Removing eyeglasses is crucial for a correct screening result. If the system detects eyeglasses, a message is displayed.
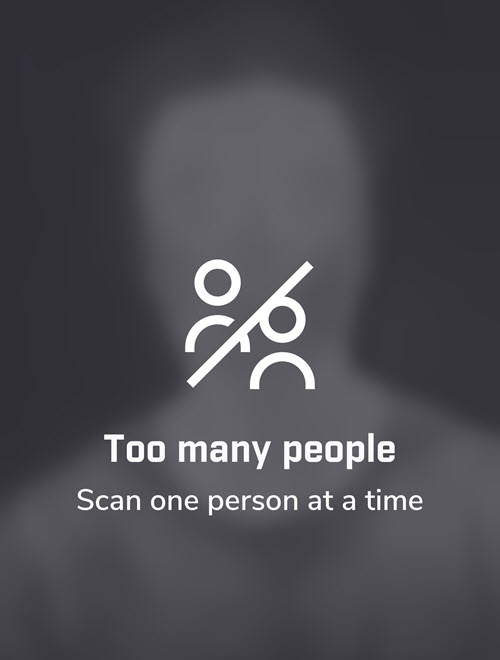
6.1.6 Too many people
The system can only screen one person at the time. If the system detects more than one face, a message is displayed.
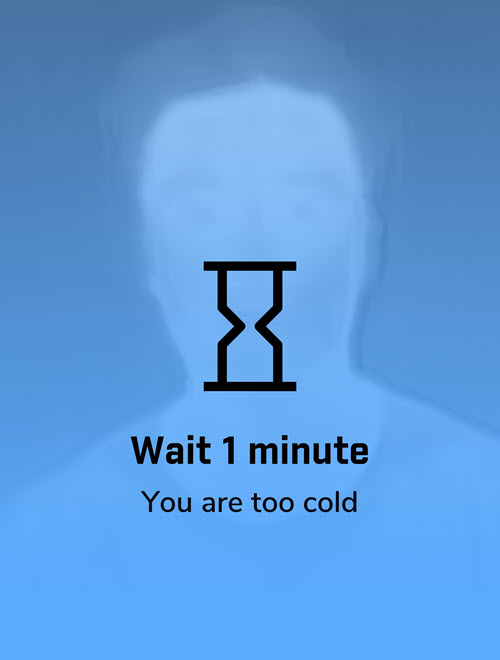
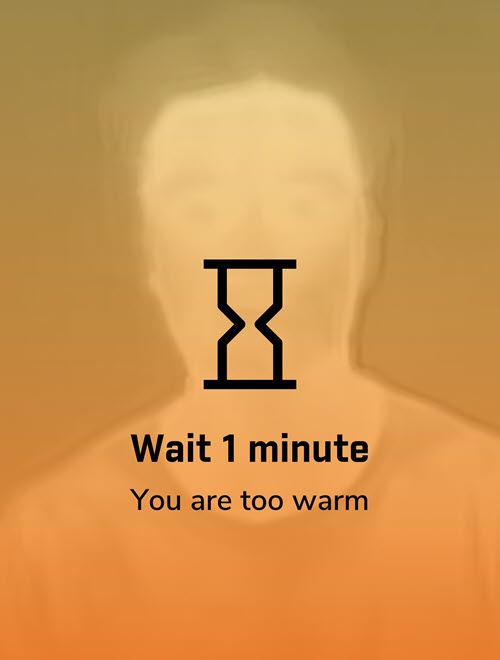
6.1.7 Too cold/warm messages
The system only evaluates temperatures within a certain temperature range. If the measured temperature is outside this range,
a message is displayed.
6.2 Operator window
The operator window has one main page with two tabs, Library and Live, and a Settings page.
6.2.1 Library tab
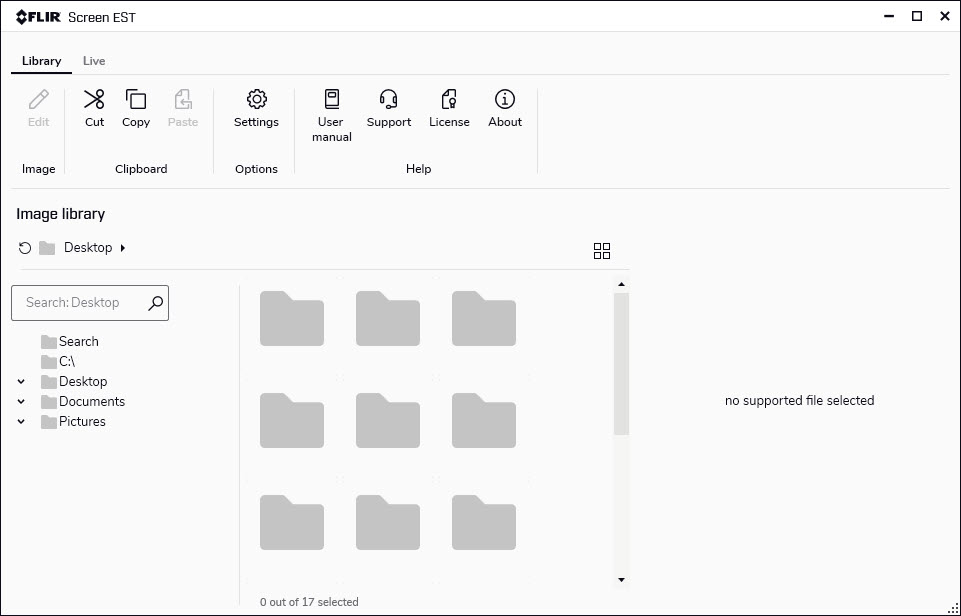
The Library tab shows the File Explorer. Here you can navigate to any folder with saved images.
When you click a folder, the images in that folder are presented in the center pane. When you click an image in the center
pane, information about that image is shown in the pane to the right.
Clicking the Library tab displays a toolbar, with options for settings, user manual, support, license, and more.
6.2.1.1 User manual
To access the FLIR Screen-EST user manual, select User manual on the Library page toolbar or go to
http://support.flir.com/resources/est
.
6.2.2 Live tab
The Live tab is where you initiate and monitor the screening.
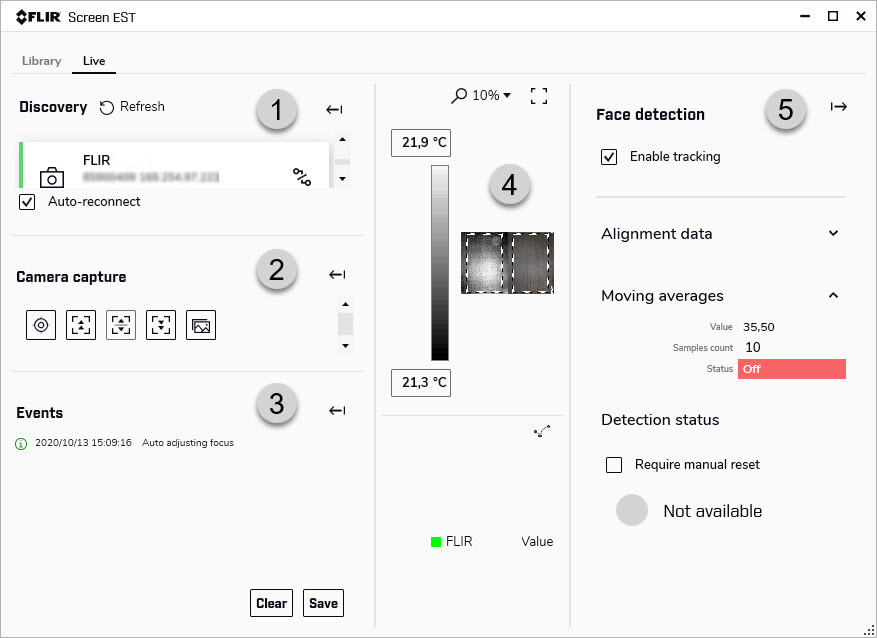
The image below shows what the user interface looks like when a camera is connected.
-
Discovery pane
This pane displays the available cameras. Find the FLIR camera and use the button to the right to connect.
When the Auto-reconnect check box is selected, the camera connects automatically next time FLIR Screen-EST starts. -
Camera capture pane
This pane includes buttons for camera control, e.g. autofocus.
-
Events pane
This pane displays all events and operations performed to a connected camera. Use the buttons to clear or save the logs to a file.
-
Camera image pane
The live thermal and visual images from the camera is displayed here.
The system is looking for faces in a part of the image which is called the region-of-interest. The dotted box on the images here indicates the region-of-interest for the face detection. The size of the region-of-interest box is defined by a setting (see section 6.3.1 Face detection tab ). You can change the size of the box by a drag-and-drop operation here. -
Face detection pane
- When the Enable tracking check box is selected, the face detection and screening functionality is enabled. To temporarily stop the screening, clear the check box.
- The Alignment data controls are used to align the images from the thermal and visual cameras. When the Auto-alignment check box is selected, the alignment is done automatically. If the images for some reason are not aligned, first clear the Auto-alignment check box and then align the images manually using the PanX and PanY controls.
- Moving averages: Value shows the current average. Samples count is the number of samples included in the average calculation. Status shows the sampling status; red when there are no samples, green when the system is adding samples to the average calculation. Hovering over the Value/Samples count/Status area displays a reset button. Click the button to reset the average value.
-
The Detection status section displays status information and screening results.
- Not available: No face detected.
- Normal: Screening result; normal temperature.
- Abnormally high: Screening result; elevated temperature.
- Glasses: Eyeglasses detected.
- Bad pose: Visitor face is not straight in front of the camera.
- Too far: Visitor face is too far from the camera.
- Too close: Visitor face is too close to the camera.
- Too many: More than one face detected.
- Waiting for exit: System is waiting for the screened person to leave the screening station.
- Below skin temperature: Measured temperature is below the Skin minimum temperature setting (see section 6.3.1 Face detection tab ).
- Above skin temperature: Measured temperature is above the Skin maximum temperature setting (see section 6.3.1 Face detection tab ).
When a screening result is displayed, Face 1 shows the measured temperature.When the Required manual reset check box is cleared, alarms are automatically reset when the screened person moves away from the camera. When the Required manual reset check box is selected, the operator must manually reset alarms by clicking inside the red Detection status box.
Clicking the Live tab displays a toolbar, with options for connection, settings, camera control, and events.

6.3 Settings page
You access the Settings page via the toolbar on the Library and Live tabs in the operator window.
To exit the Settings page, click Close at the bottom right of the page.
6.3.1 Face detection tab
- The Default samples count is the number of samples that are included in the average calculation.
- When the Reset moving average after specified time check box is selected, the system automatically resets the moving average when the specified time has elapsed since the last screening. When the system starts to build up a new moving average, the first measurement will be evaluated based on the Temperature after reset value. For more information, see section 5.3.1 Reset of moving average .
Moving average
- The screening algorithm only evaluates temperatures between the Skin maximum temperature and Skin minimum temperature values. It is recommended to use the default values.
- There will be an alarm if the measured temperature is more than the sum of the moving average and the Allowed deviation value. Setting a low value will detect smaller elevations in skin temperatures, but it will also generate more false alarms. With a high value, there is a risk of missing people with elevated skin temperatures.
Face detection status
- Use the Detector type list to select thermal or visual face detection.
Detector type
The application can use either the thermal data stream or the visual data stream for face detection and definition of measurement
area.
- Select the Mirror image check boxes to mirror (flip) the image.
- Use the Image orientation list to select portrait or landscape orientation.
Image settings
These settings apply to the live camera images in the operator window.
- The Initial size values define the size of the region-of-interest box (in percentage of the image).
Region of interest
The system is looking for faces in a part of the image which is called the region-of-interest. On the Live page, the dotted box indicates the region-of-interest for the face detection.
6.3.2 User screen tab
The settings on the User screen tab apply to the visitor window.
- Use these fields to change the status messages. You may, for example, want to translate the messages to your local language.
Custom status messages
- Select the font size for the status messages.
Font size
- Use the Screen orientation list to select portrait or landscape orientation.
- Select the Show secondary image check box to display both thermal and visual video.
- Use the Show hats/glasses/masks check boxes to select what symbols to display.
- Select the Enable animations check box to have a moving blue line in the visitor window, indicating that the system is in operation.
- Use the Swap video streams check box to select the display of thermal or visual video in the main image.
Visibility settings
6.3.3 Output tab
FLIR Screen-EST can be configured to save images and data when an elevated skin temperature is detected. It is the responsibility of your
company to handle any saved images and data in accordance with applicable local data protection laws.
- When the Save dual snapshot separately check box is selected, a separate visual image will be saved in addition to the combined thermal and visual image.
Snapshot options
- When the Open output folder after saving snapshot check box is selected, the folder with the saved image will open when the saving is completed.
- To change the file path to the folder where you want to store saved images, click Browse and then select the folder.
Output options
- When the Log alarms to output folder check box is selected, an image (combined thermal and visual image) and a data file (*.csv) is automatically saved when an elevated skin temperature is detected. By default, this check box is cleared and no images are saved automatically.
- When the Use sound alarm check box is selected, there will be a sound when an elevated temperature is detected.
Alarm
- When the Enable digital output check box is selected, a digital pulse will be output after a Normal temperature or Elevated temperature screening result.
- Use the Elevated temperature signal’s timespan and Normal temperature signal’s timespan fields to define the time (in milliseconds) that the digital output is enabled when a positive/negative result is detected by the camera. Set the value to 0 milliseconds to make the output enabled as long as a positive/negative condition is met.
Digital output
The screening result can trigger an external device, such as a gate, lights, or a siren, connected to the digital I/O connector
on the camera.
Cameras that support multiple digital outputs will send a signal on digital output 1 for a positive condition (Elevated temperature)
and a signal on digital output 2 for a negative condition (Normal temperature).
6.3.4 Webhooks tab
The Webhooks tab is used to control the webhooks functionality. For more information, see section
8.2 Webhooks
.
- Use the button to activate/deactivate webhooks. The settings can only be changed when webhooks is inactive (red Off).
- Select the Run on application start check box to activate webhooks automatically when the FLIR Screen-EST starts.
- Use the Computer port field to specify the path port on which FLIR Screen-EST shall listen to incoming POST requests.
-
Use the URL fields to specify the URL for the callbacks.
The callback URL format is:
http://address:port/api/callback/#
where # = alarm/pass/misreading/ready/waiting/error/standby- Default alarm URL (alarm): The screening result is Elevated temperature.
- Default no elevated skin temperature URL (pass): The screening result is Normal temperature.
- Default misreading URL (misreading): There is no successful screening result within the time limit set by the Misreading timeout setting.
- Default system’s readiness URL (ready): The system is ready to perform a screening.
- Default system awaiting URL (waiting): The system is waiting for a person to screen.
- Default system error URL (error): System error, e.g. no camera is connected or not enough samples have been collected.
- Default system stand-by URL (standby): The screening is deactivated and the system closed message is displayed in the visitor window.
- Use the Misreading timeout field to set the time limit for a successful screening result (normal or alarm).
6.3.5 General tab
- When the Start application on system start-up check box is selected, FLIR Screen-EST will start automatically when the device (computer or tablet) starts up.
- When the Enable application monitoring check box is selected, FLIR Screen-EST will restart automatically after an unexpected crash or if the application is not responding.
- Click Factory default settings to reset the application to factory settings. FLIR Screen-EST will restart to apply the new settings.
- Click Clear cache to delete locally cached content. FLIR Screen-EST will restart to apply the new settings.
- Click Settings panel password to protect the Settings page with a password. This opens a dialog box. Select the Protect settings panel with password check box and enter the password.
General options
6.3.6 Updates tab
Select how you want to manage updates of the FLIR Screen-EST.
When the Check if updates are available check box is selected, a check for updates will automatically be performed every time the application is started.
When the Prompt to install updates check box is selected, you will be asked to install any available updates. The Check if updates are available option must also be enabled.
If updates need to be downloaded via a proxy service, an additional configuration is needed. In the Proxy settings dialog box, select the Use proxy check box, and then enter the requested information. Click OK to save.
6.3.7 Theme tab
Change the theme of the user interface. FLIR Screen-EST will restart to apply the new settings.
6.3.8 File explorer tab
Select if you want to show hidden files and display folder previews.
6.3.9 Editor tab
Change the file path to the folder where your custom palettes are located.
6.3.10 Regional settings tab
Select the language and units to be used in the user interface. FLIR Screen-EST will restart to apply the new settings.

