5 Installation — FLIR EST Kiosk
This chapter describes how to install the FLIR EST Kiosk.
- Mount the stand, tablet, and camera unit.
- Connect the tablet to a Wi-Fi network (recommended).
- Activate the FLIR Screen-EST application.
The installation includes the following main steps:
5.1 List of contents
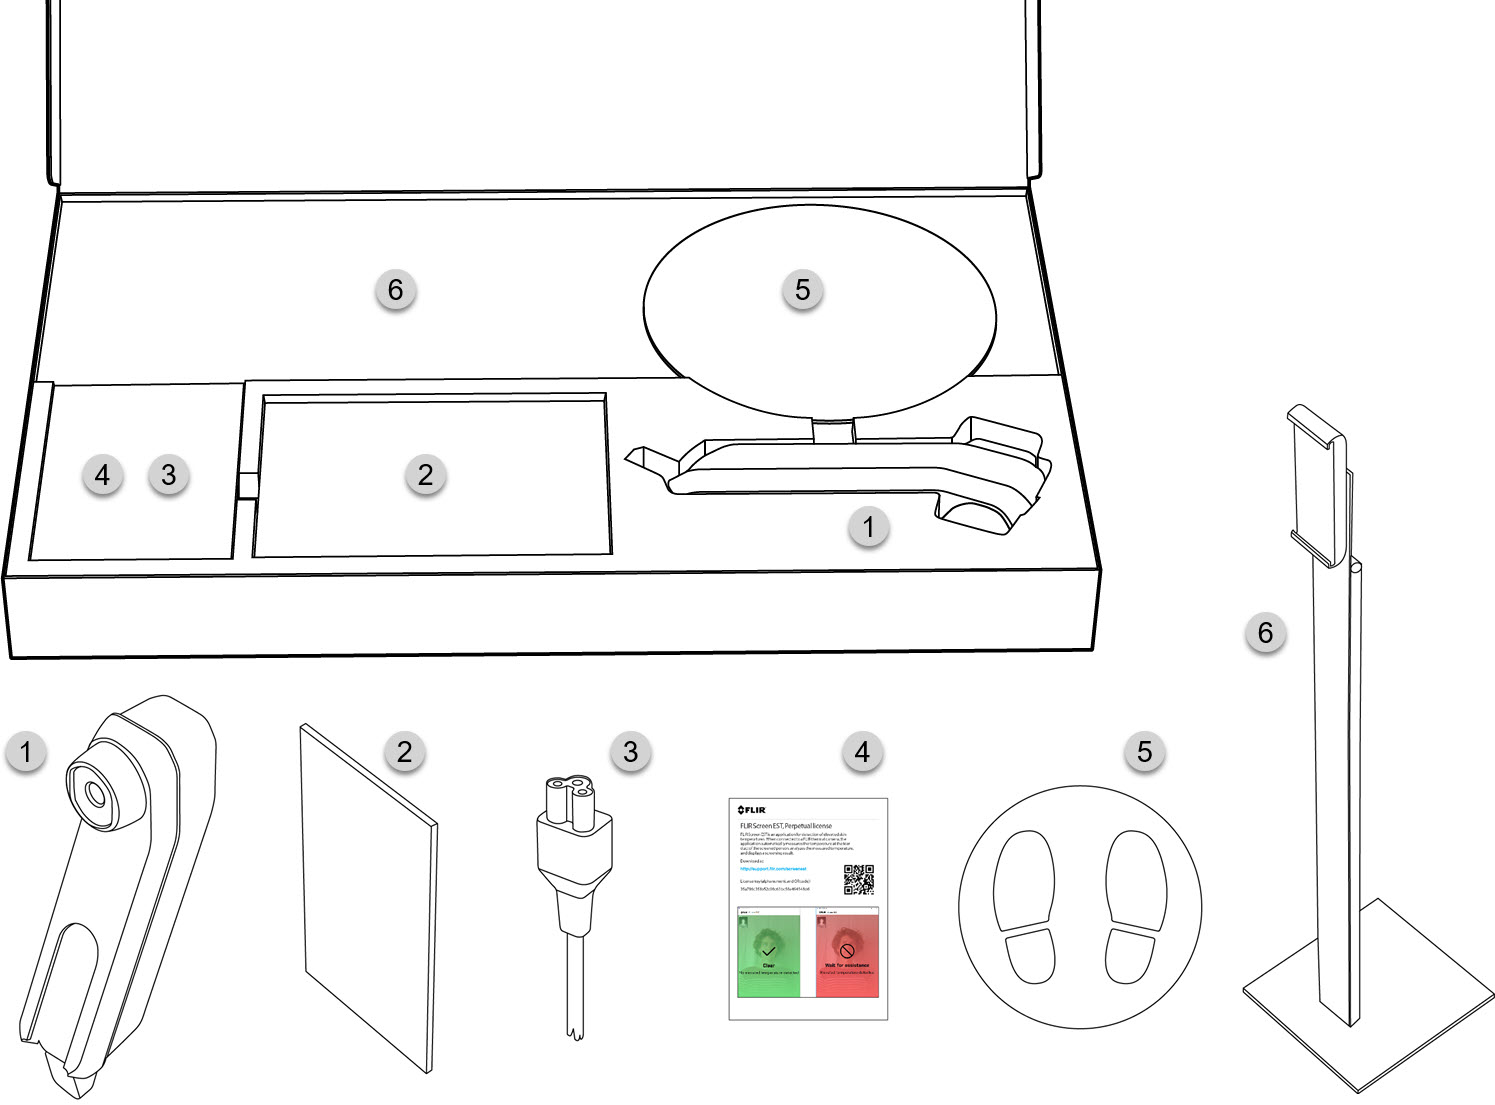
- Camera unit.
- Tablet.
- Mains cable.
- Printed documentation, including FLIR Screen-EST license card.
- Screening position floor sticker.
- Tablet stand.
5.2 Mount the stand, tablet, and camera unit
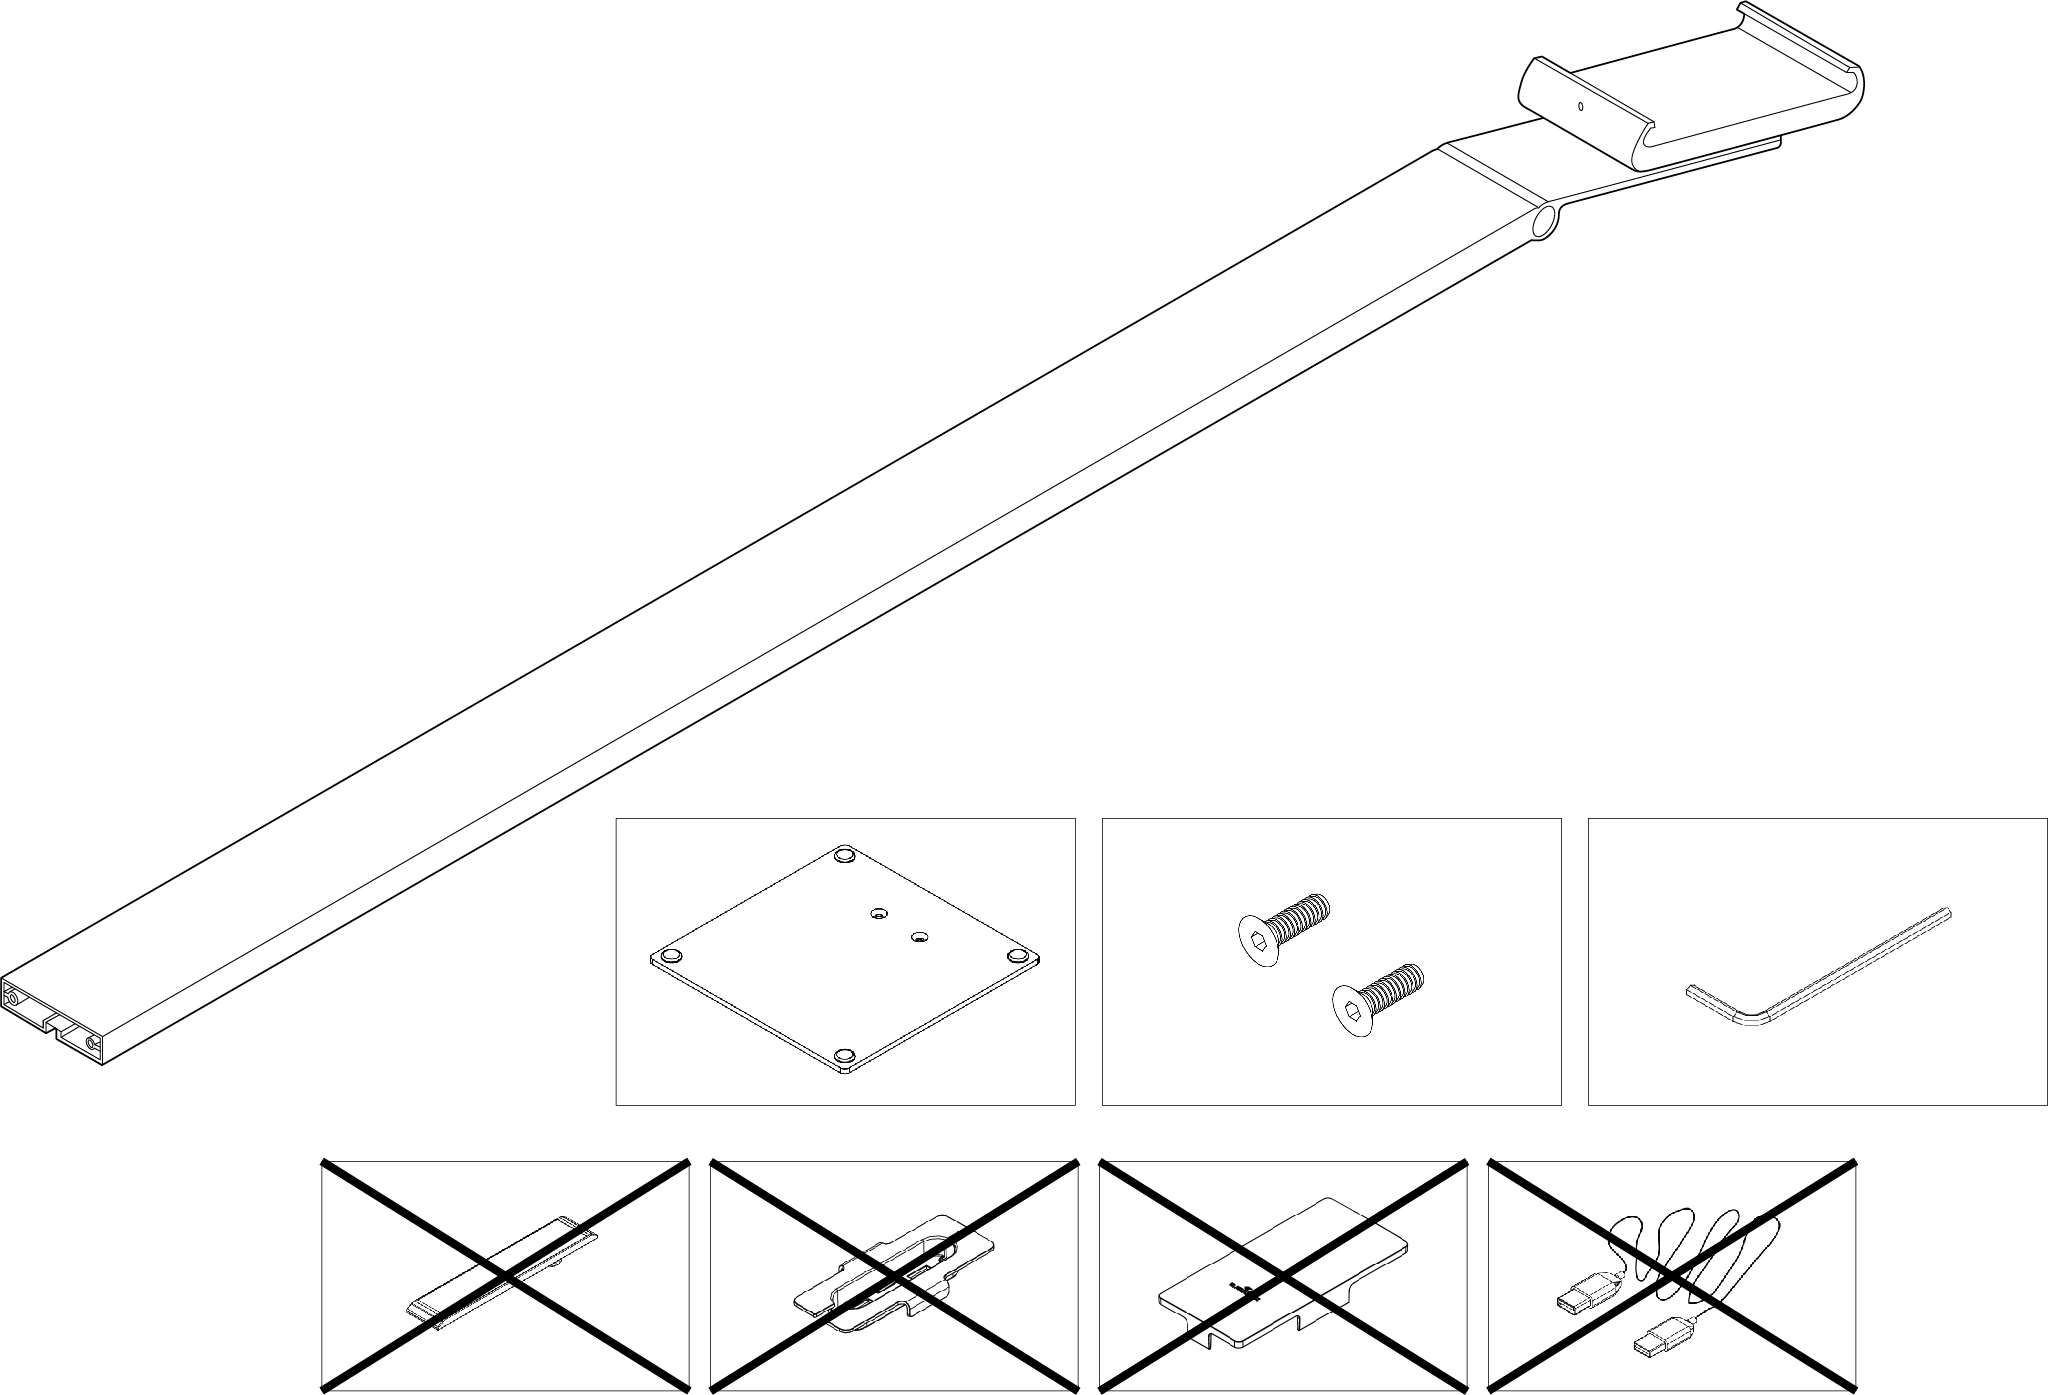
1. Open the stand box and find the stand, foot, 2 screws, and Allen key. The other parts are not needed for this installation.
|
|
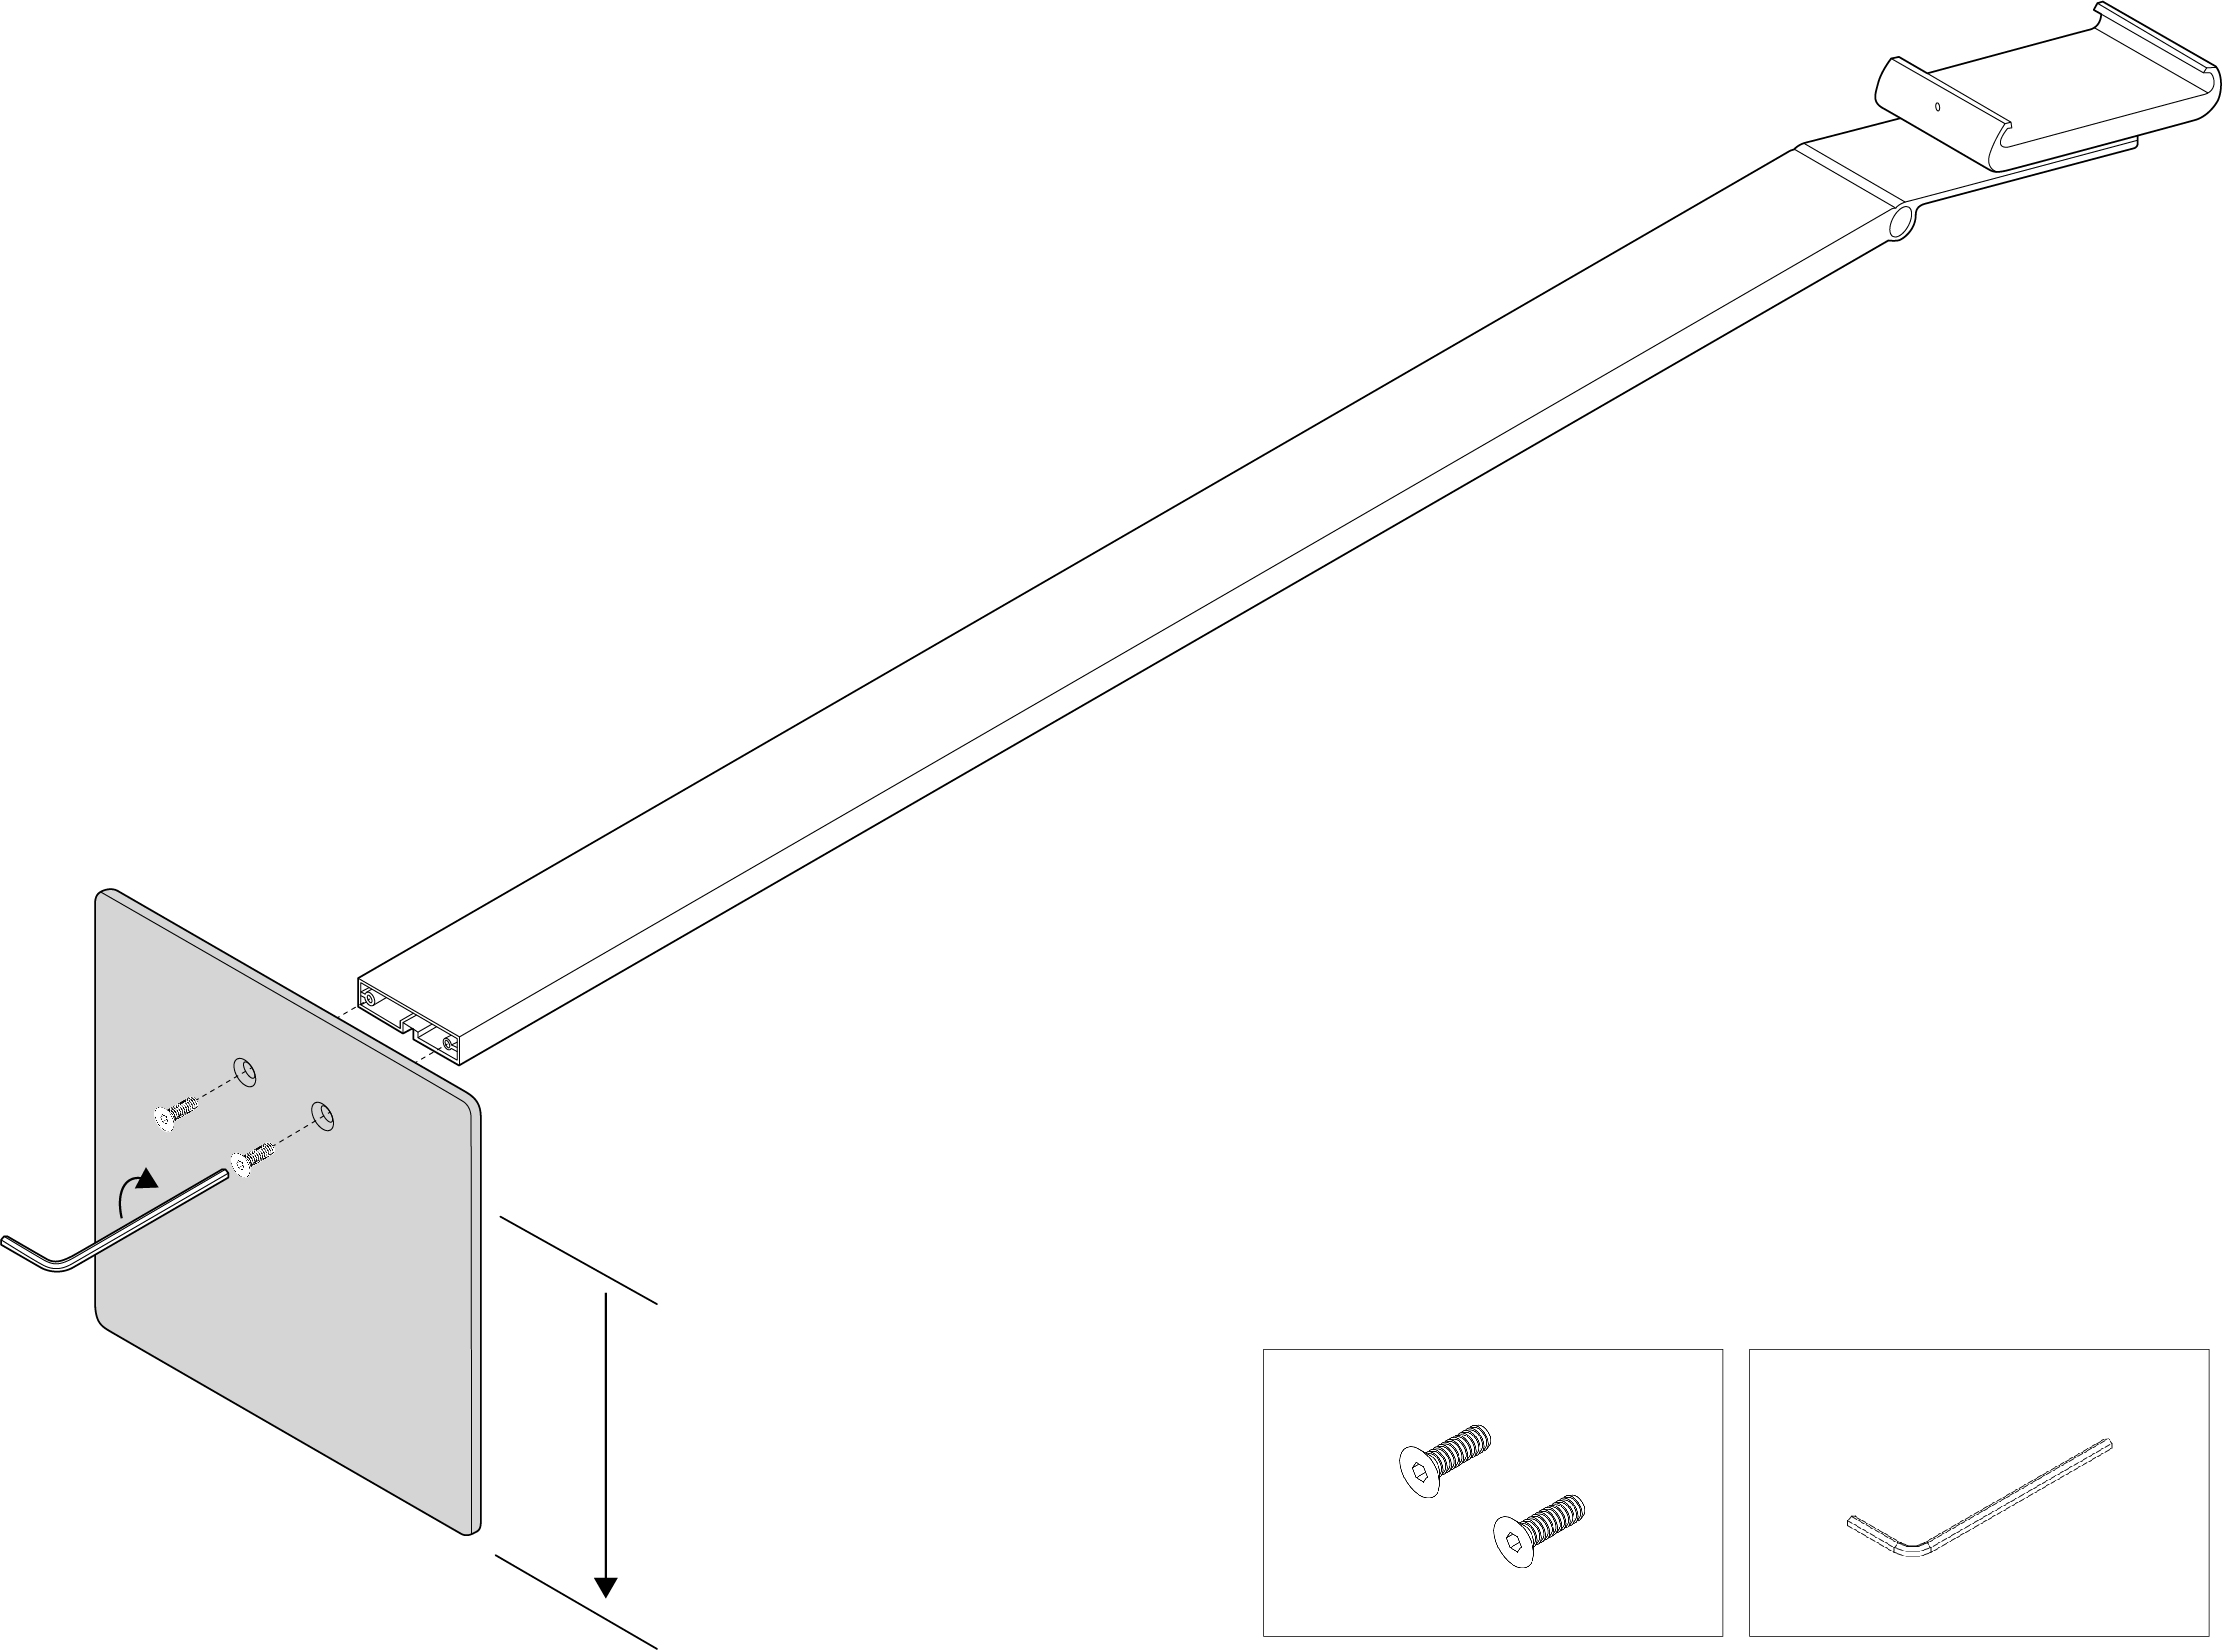
2. Mount the foot. Make sure the orientation of the foot is correct.
|
|
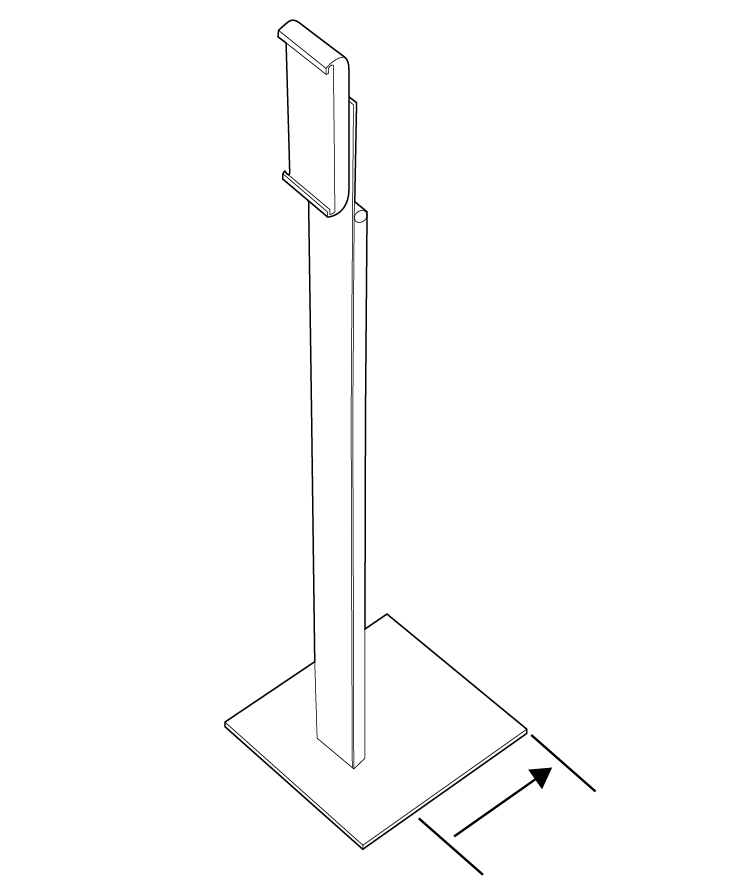
3. Check the orientation of the foot. Incorrect mounting can cause the stand to tip over.
|
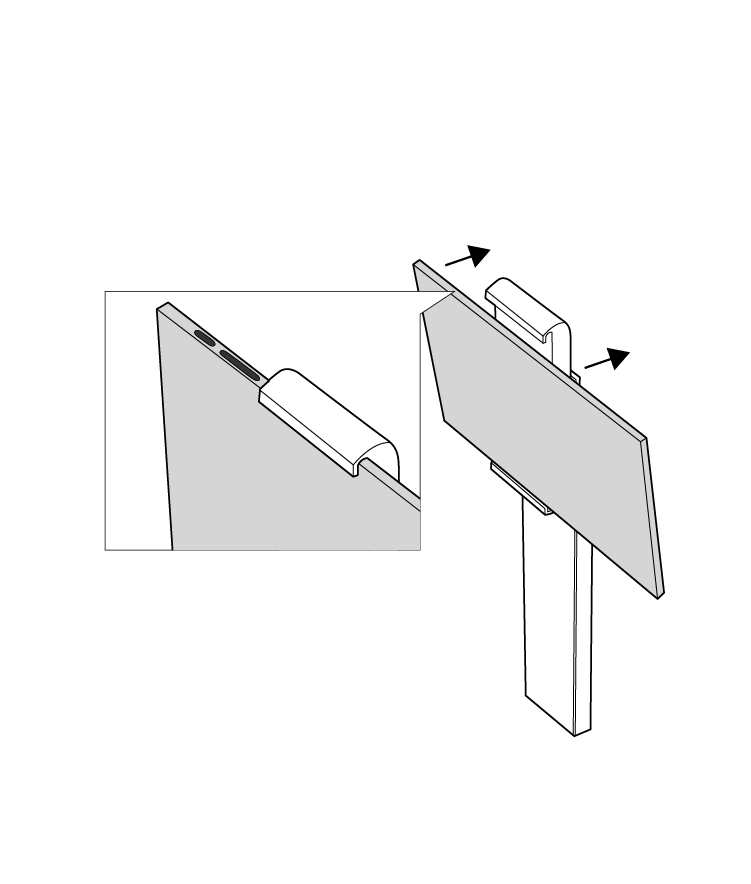
4. Fit the tablet in place, with the clamp close to the buttons. By that, there will be room for the camera unit.
|
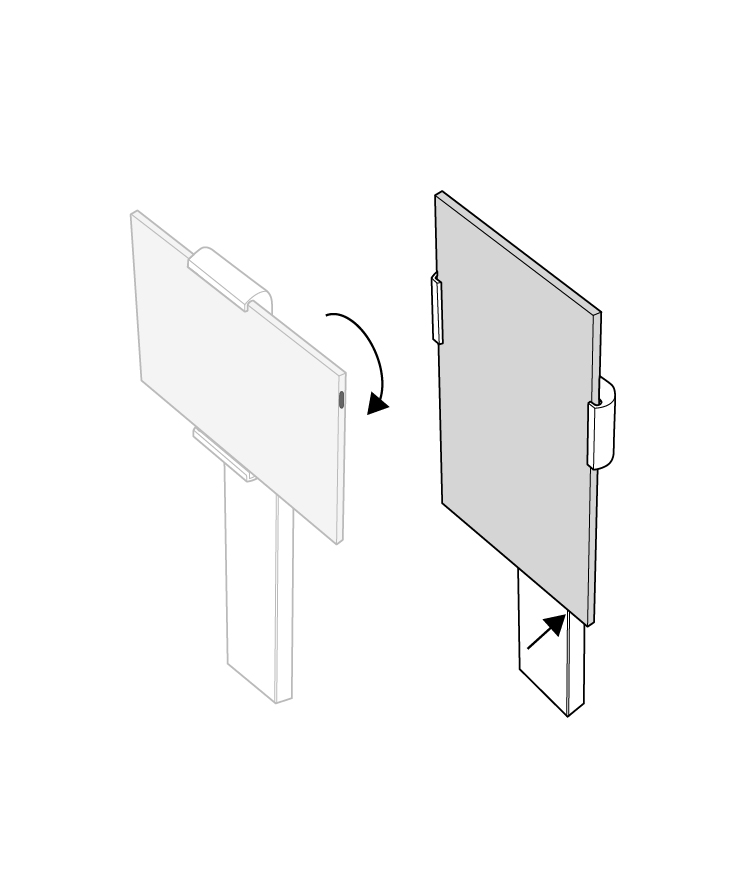
5. Rotate the tablet to portrait mode. Make sure the USB connector is at the bottom.
|
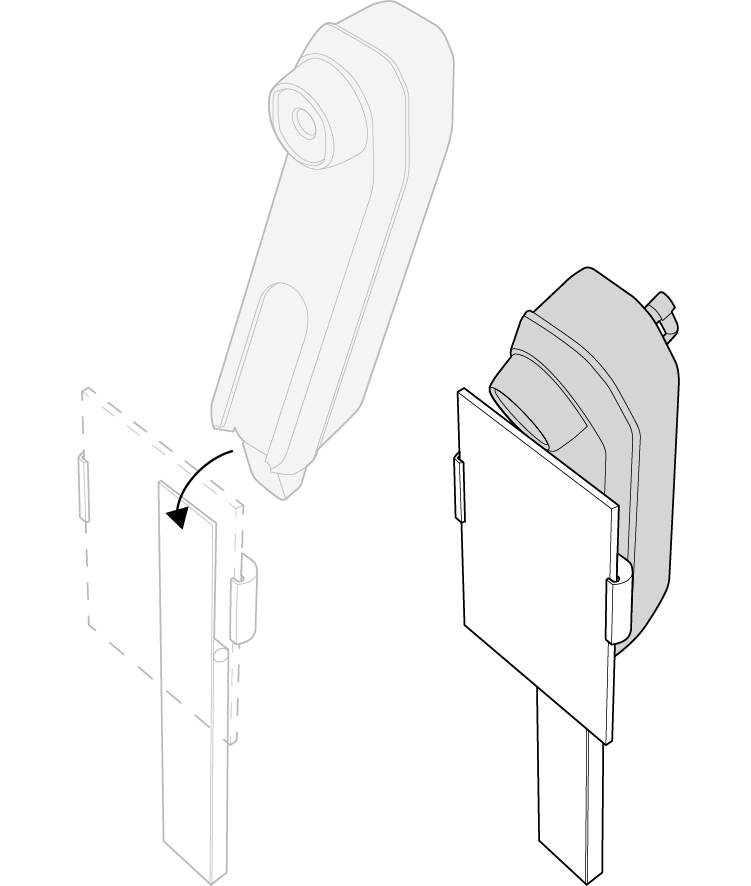
6. Slide the camera unit onto the stand.
|
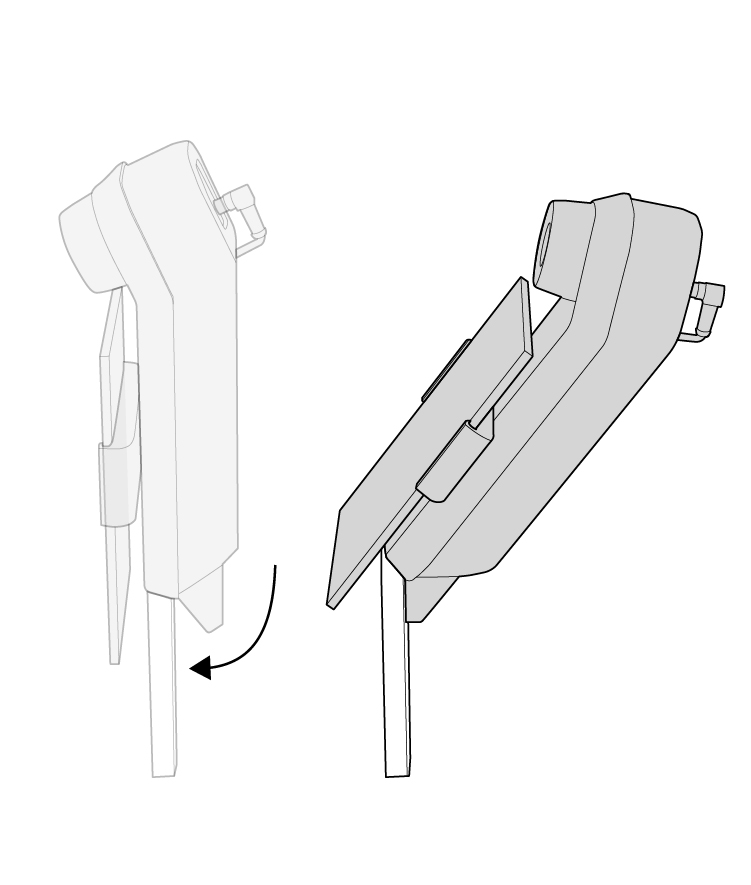
7. Tilt the assembly backwards until it stops.
|
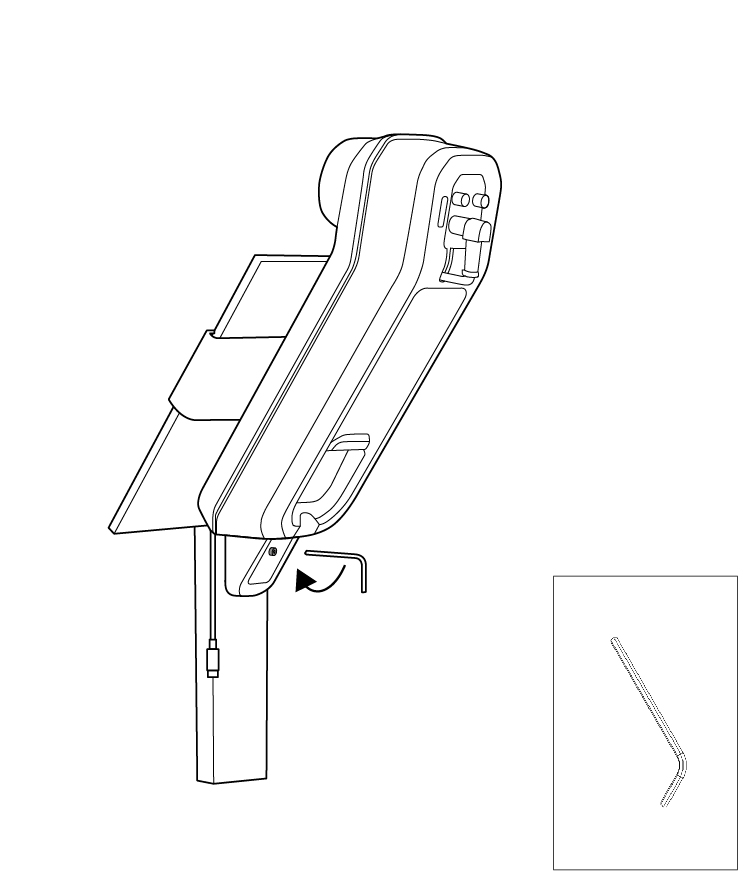
8. Lock the camera unit in place.
Tighten the screw until it stops. |
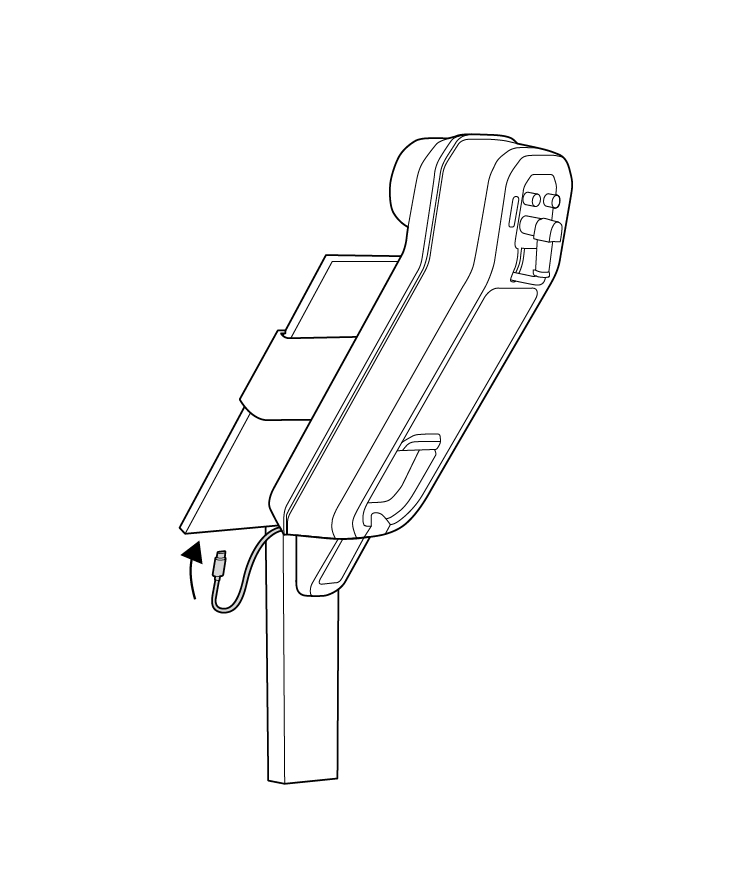
9. Connect the cable from the camera unit to the USB connector on the tablet.
|
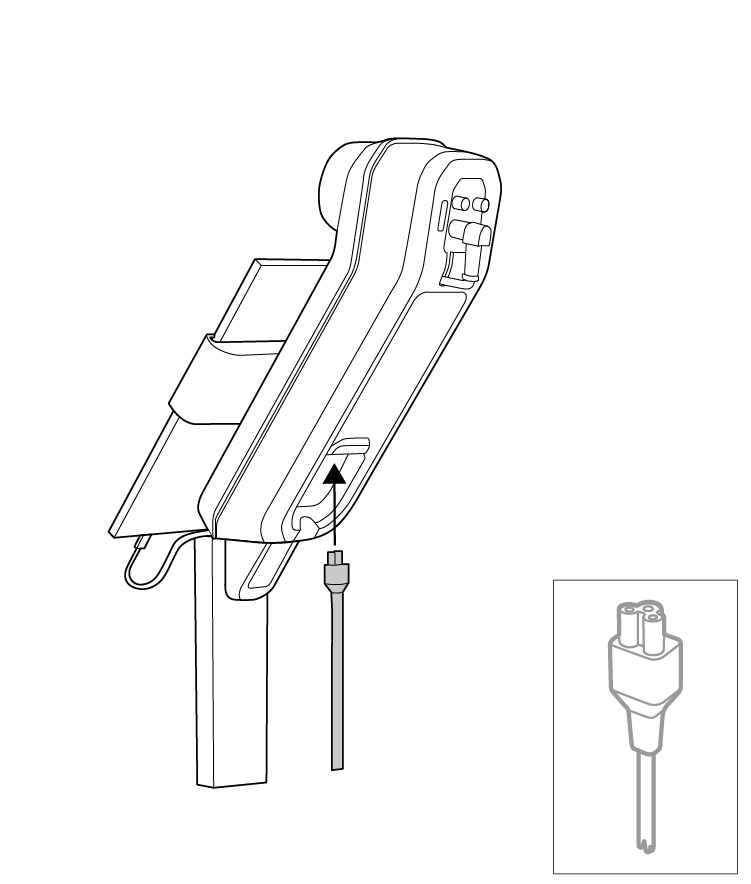
10. Connect the power cable to the camera unit.
|
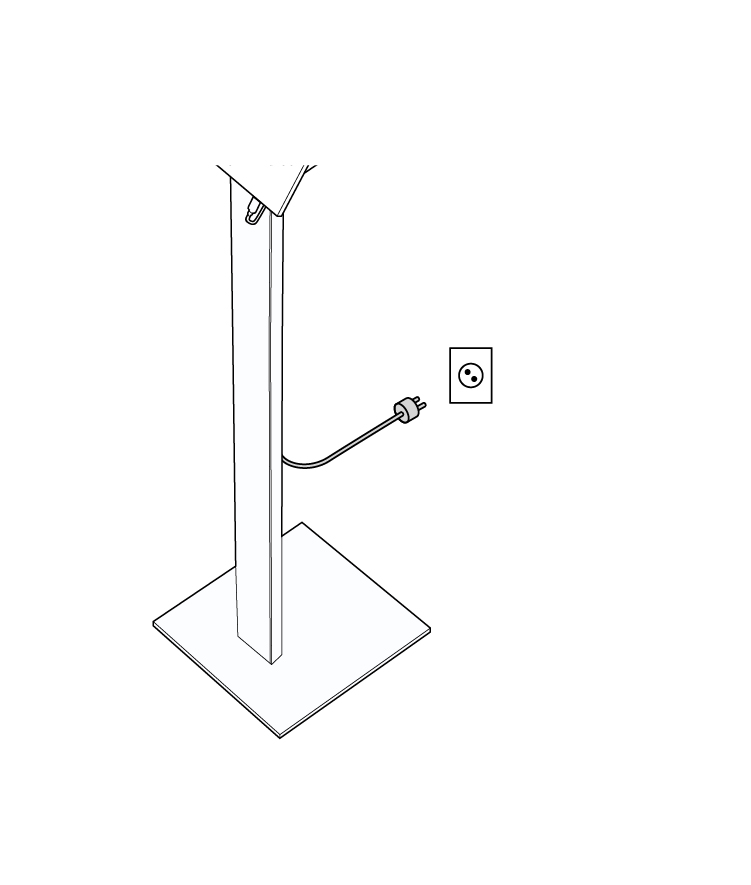
11. Connect the power cable to a power outlet.
|
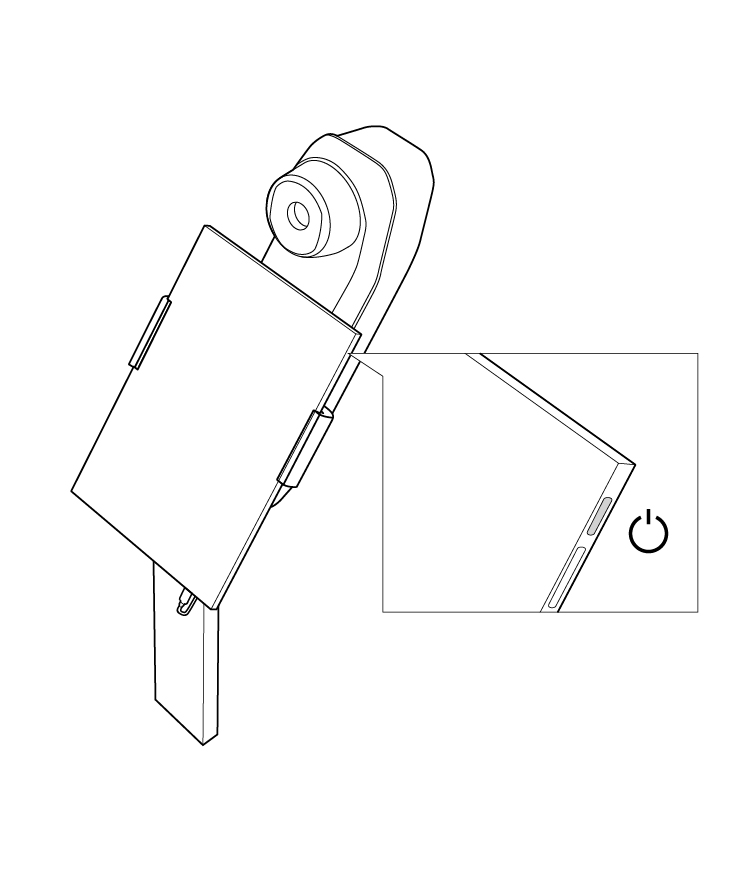
12. Turn on the tablet.
|
5.3 Connect to Wi-Fi
To take advantage of our latest software, it is important that you keep your FLIR EST Kiosk updated. When the FLIR EST Kiosk is connected to the internet, automatic checks for updates and installation of new software versions is possible. For more
information, see section
13.1
FLIR Screen-EST software update
.
To connect the tablet to the internet, swipe in from the right edge of the screen. This opens the Action center, where you can connect to a Wi-Fi network.
5.4 Activate FLIR Screen-EST
FLIR Screen-EST is the application used to perform the screening. FLIR Screen-EST is pre-installed on the tablet, but you must activate it. The activation is easiest if the tablet is connected to Wi-Fi,
but you can also do an offline activation.
To activate the FLIR Screen-EST, do the following:
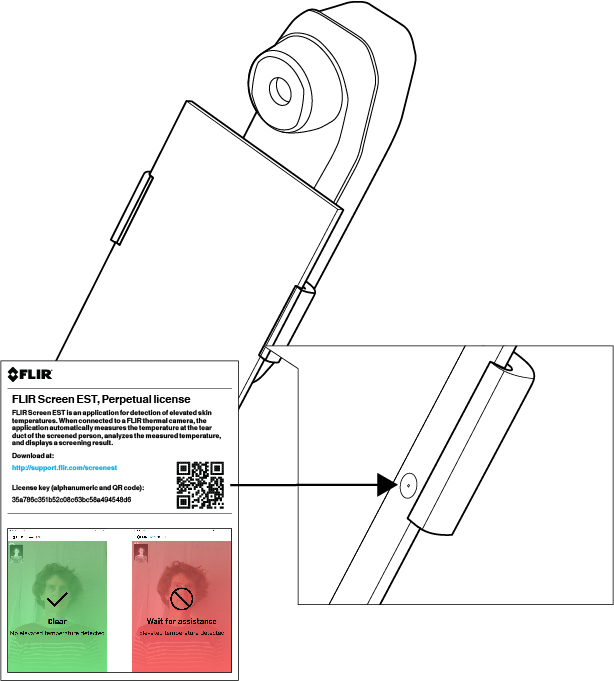
- Make sure you have the FLIR Screen-EST license card. This is a printed card included in the FLIR EST Kiosk package.
- Start the FLIR Screen-EST application from the Start menu or by double-tapping the desktop icon. The activation dialog is displayed.
-
Online activation (internet access):
-
Hold the FLIR Screen-EST license card with the QR code in front of the tablet camera (located to the right of the screen). This enters the license
key.
- Enter contact details, e.g. to your IT department, in the Customer name and Customer e-mail text boxes.
-
Tap Validate.
Offline activation (no internet access): See section 5.4.1 Offline activation . -
Hold the FLIR Screen-EST license card with the QR code in front of the tablet camera (located to the right of the screen). This enters the license
key.
-
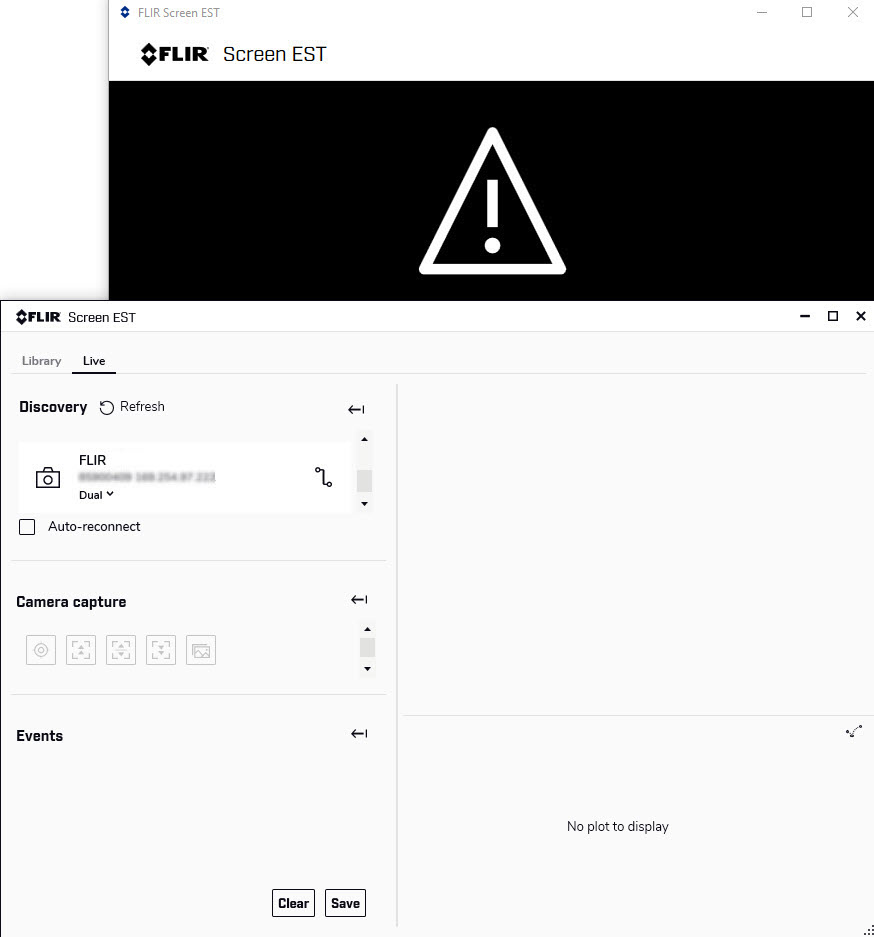
When the activation is completed, the FLIR Screen-EST application opens in two windows:
- The operator window is used by the operator for setup, control, and monitoring.
- The visitor window is what the screened person sees.
5.4.1 Offline activation
- Start the FLIR Screen-EST application.
- Click Offline activation - no internet access.
- Make a note of the information in the Machine identifier text box.
- On a device with internet access, go to https://support.flir.com/screenest .
- Click the link Offline activation.
- Click the link of your preferred language.
- Enter your contact details in the Name and E-mail text boxes.
- In the Serial number text box, enter the license key available on the FLIR Screen-EST license card.
- In the Machine code text box, enter the Machine identifier from step 3 above.
- Click Request activation code. This displays the generated activation code that at the top of the page.
- Return to the FLIR Screen-EST application, and then enter the code into the Activation code text box.
- Click Validate.
- The activation is completed and FLIR Screen-EST starts.
